To-Do Service
The To-Do Service allows users to create and manage simple tasks so they can easily keep track of what needs to be done. Tasks are stored within the application and can be reviewed at any time, helping users stay organized and focused.
This service was the first feature created during the development of the Busi Tools Flutter application and serves as a core productivity tool within the app.
When the To-Do Service is opened, the user is presented with a clean and minimal default screen. If no tasks are available, a friendly empty state message is displayed, indicating that there are currently no tasks to complete.
The screen includes an animated background, designed to create a calm and engaging user experience while keeping the interface uncluttered. A floating action button is available, allowing users to quickly add a new task.

To Do Item
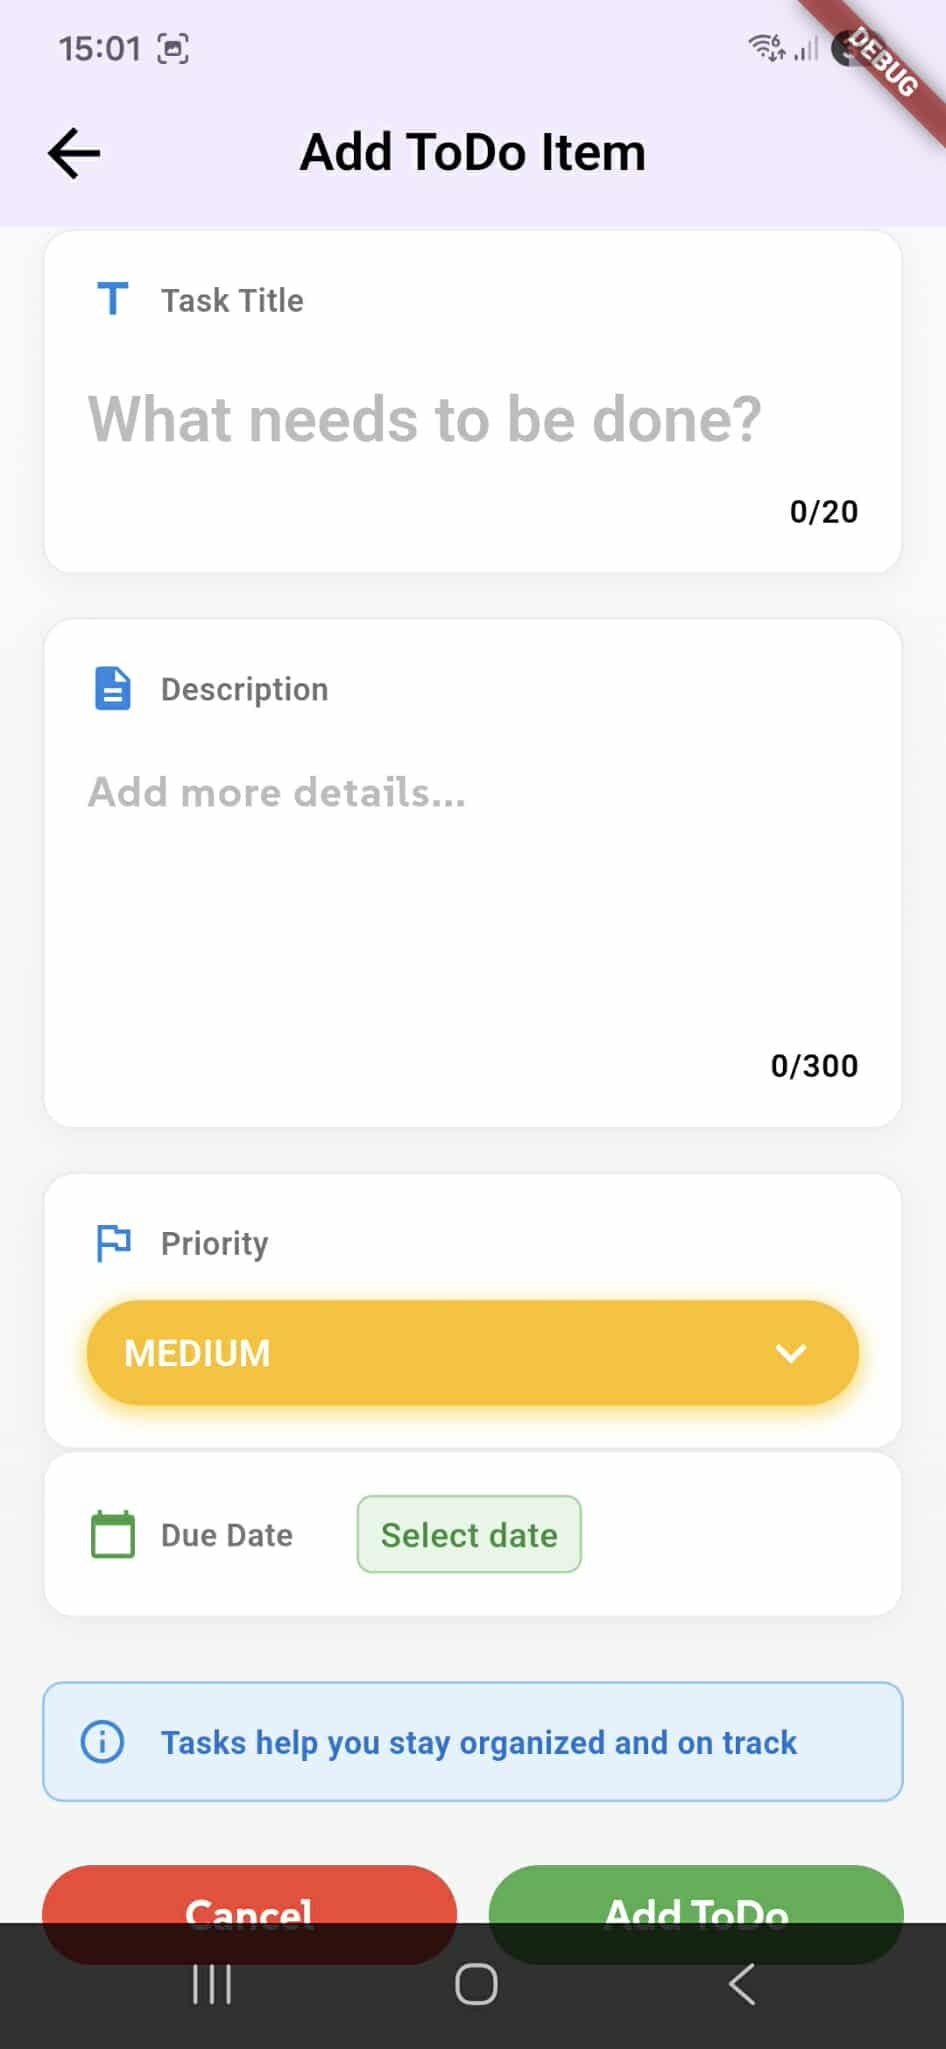
The To-Do Item screen allows users to create a new task by providing a title and description, both of which are required to save the item. These fields ensure each task is clear and easy to understand.
Users can assign a priority level to each task, choosing between Low, Medium, or High, with Medium set as the default. A due date can also be selected; if no date is provided, it is automatically set to seven days from the creation date.
This screen is designed to make task creation quick and intuitive while still offering essential control over deadlines and importance.
Priority level
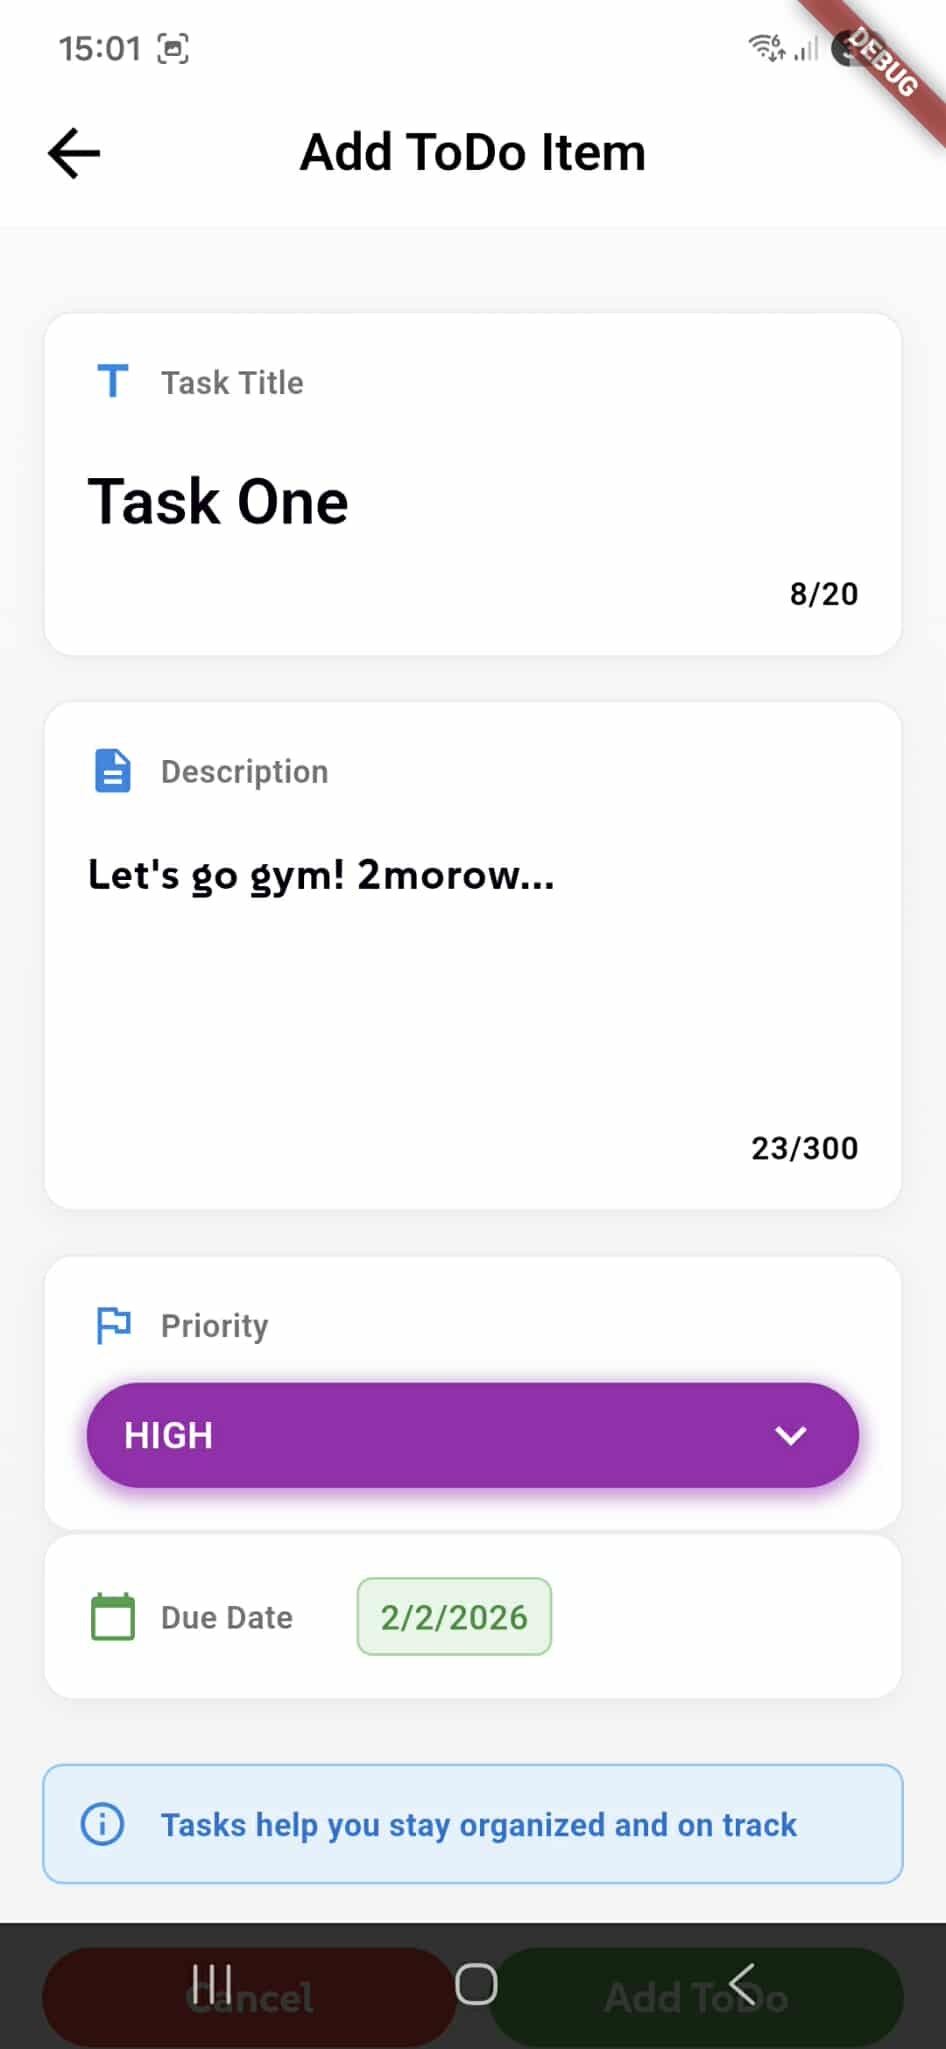
The To-Do Item screen includes a custom priority dropdown that allows users to quickly assign an importance level to each task. The dropdown presents three clearly defined options: Low, Medium, and High.
Each priority level is visually distinguished by color to improve clarity and usability. Low priority is represented in green, Medium in yellow, and High in purple, making it easy for users to recognize task importance at a glance.
The selected priority is displayed directly within the input field, and opening the dropdown reveals the options in a sheet-style menu that keeps the interface clean and focused. This design helps users set priorities quickly without interrupting the task creation flow.

Creating a To-Do Item
Once all required fields are filled in the To-Do Item screen, users can create their task by tapping the green "Add ToDo" button located at the bottom of the screen. This button becomes active only when both the title and description fields contain valid input, ensuring that incomplete tasks cannot be saved.
When the button is pressed, the new task is immediately saved to the user's to-do list with all the specified details: the task title, description, priority level, and due date. The system processes the information and adds the task to the appropriate view, making it instantly available for tracking and management.
Task Filtering and Sorting
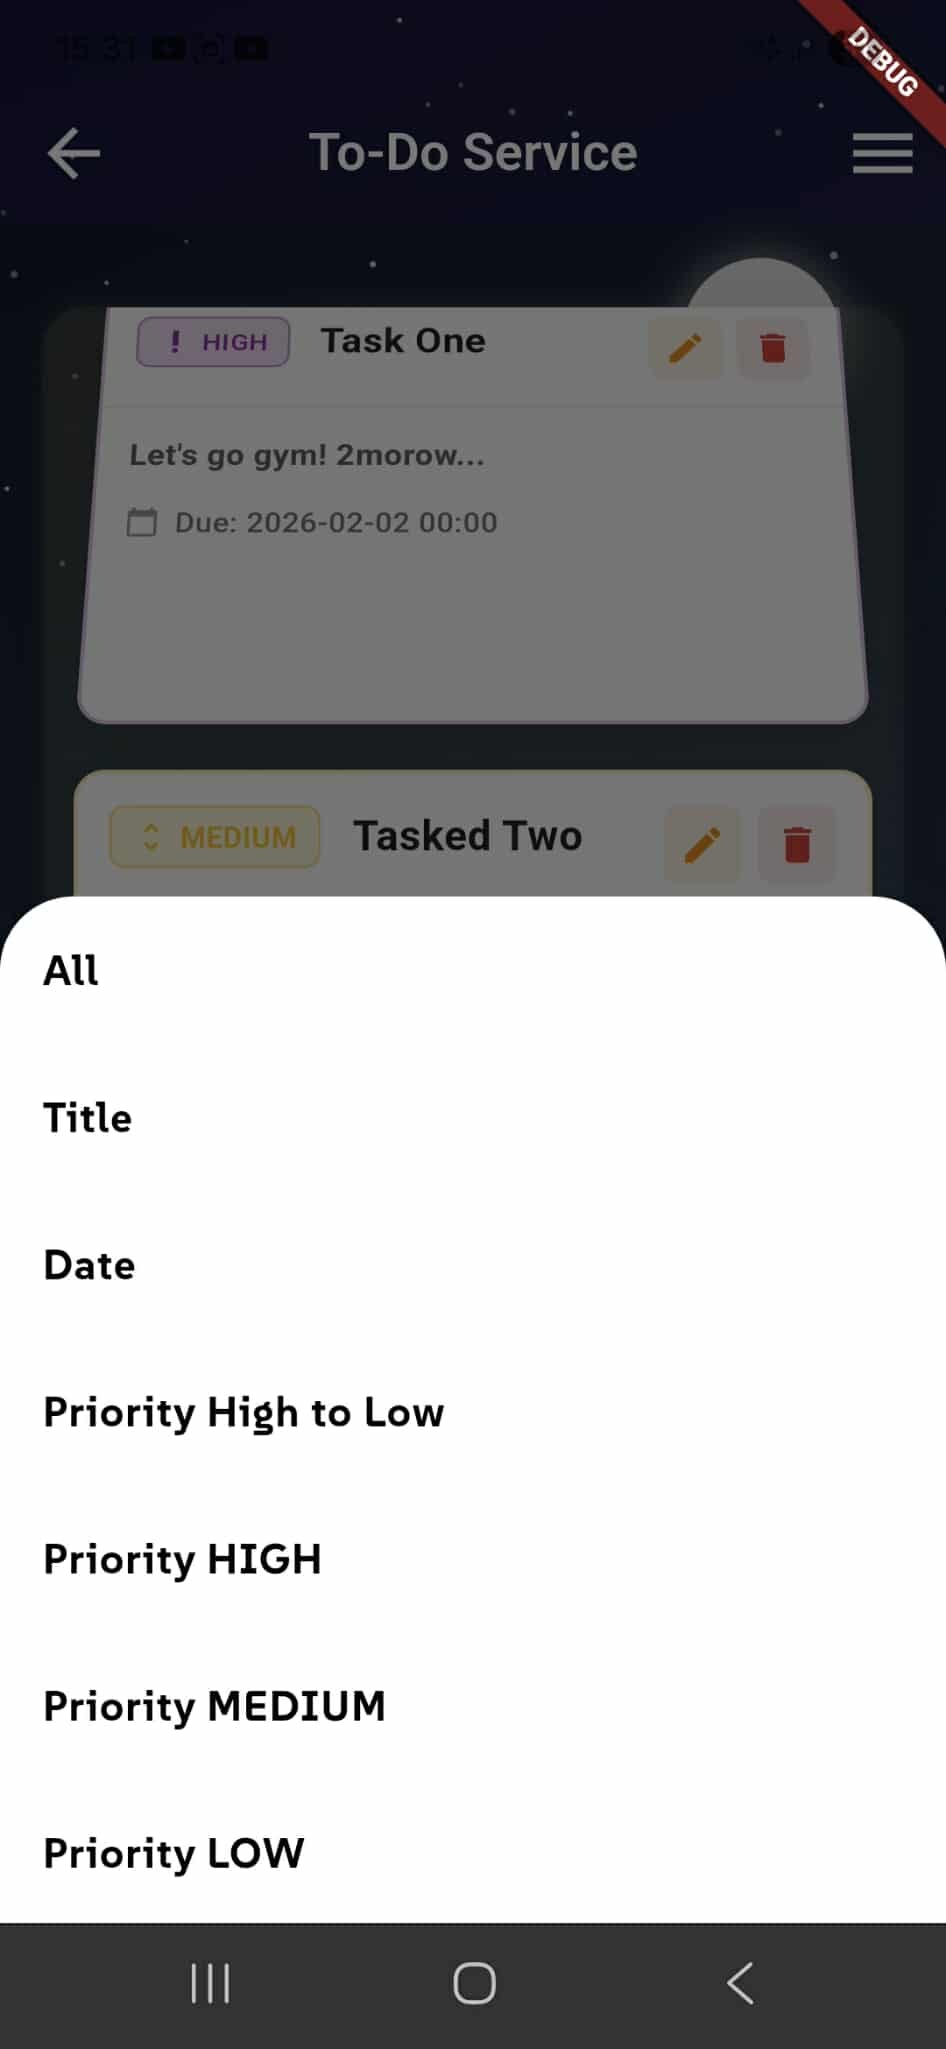
The To-Do Service includes a filtering and sorting menu accessible by tapping the menu icon in the top-right corner of the main task list screen. This opens a modal bottom sheet that provides multiple options for organizing and viewing tasks based on different criteria.
Users can filter and sort their task list using the following options: All (displays all tasks), Title (alphabetical sorting), Date (chronological order by due date), Priority High to Low (shows highest priority tasks first), and individual priority filters including Priority HIGH, Priority MEDIUM, and Priority LOW. When a filter is selected, the task list immediately updates to show only the items matching the chosen criteria, helping users focus on specific tasks and manage their workload more effectively.
Editing a Task
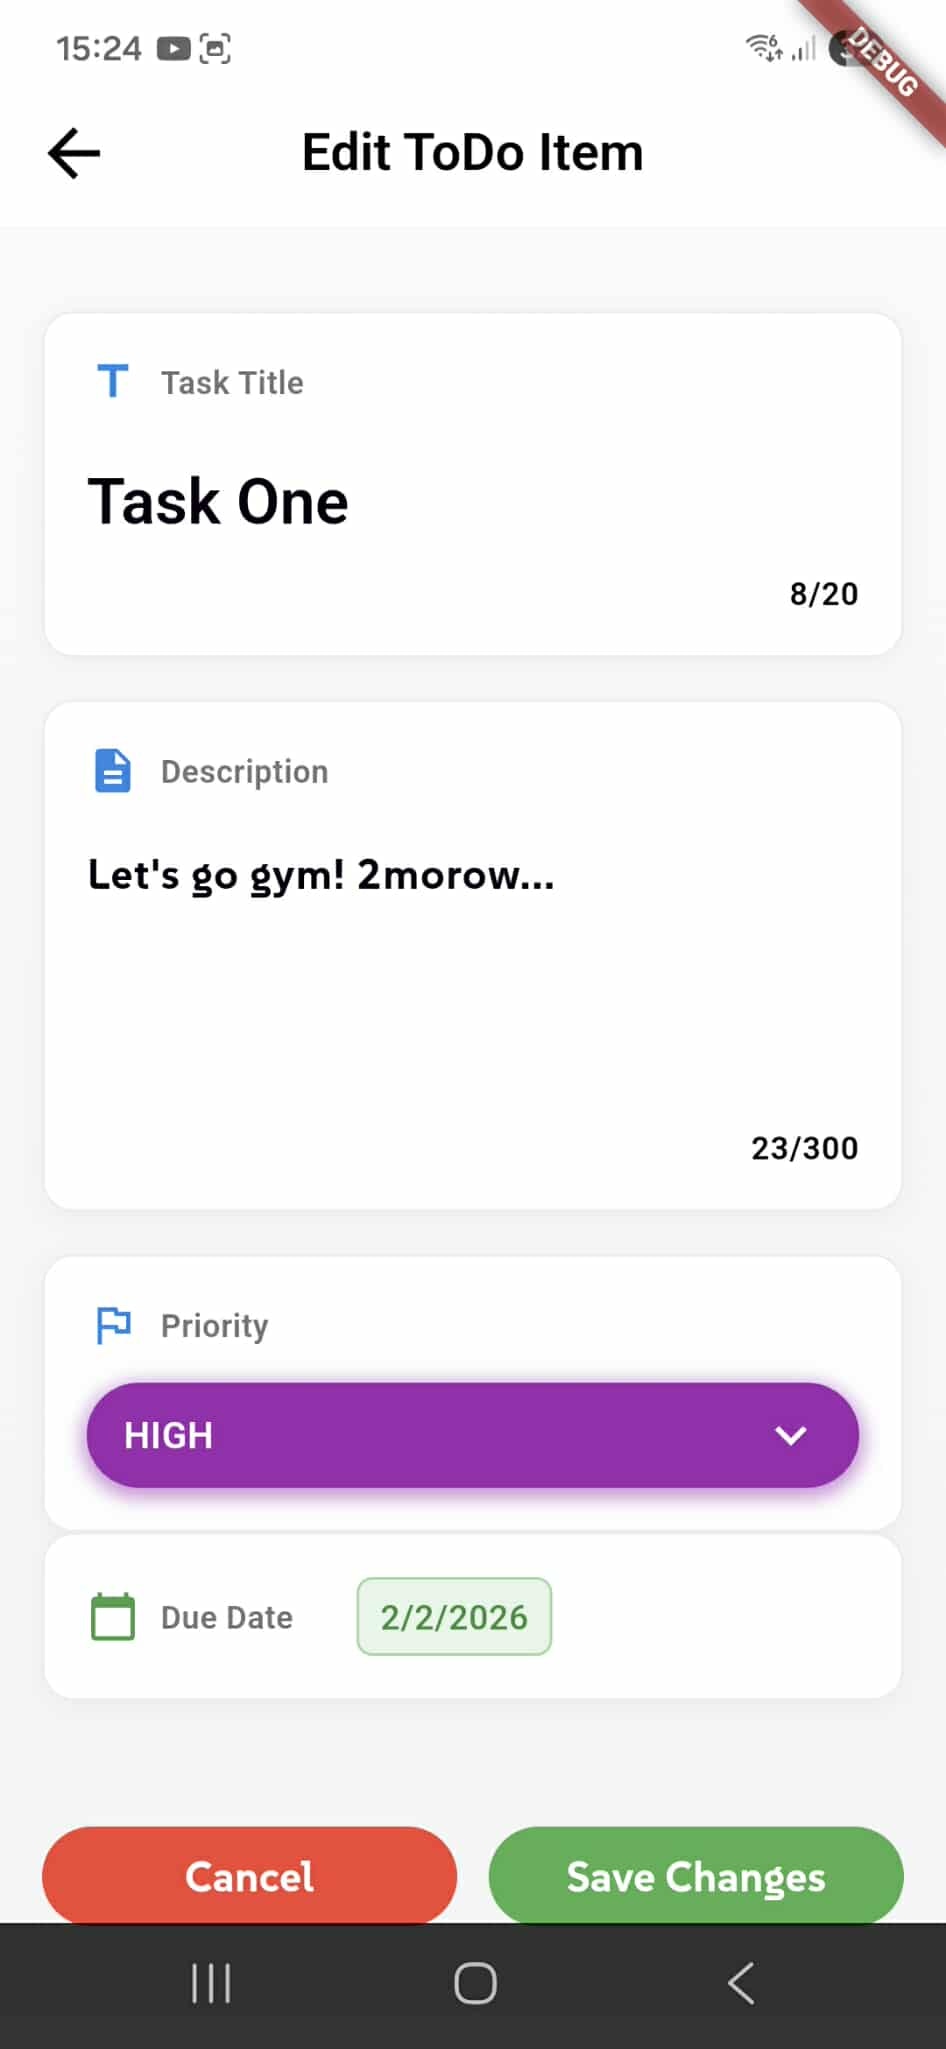
Users can edit any existing task by tapping the edit icon (pencil) on the task card in the main list. This opens the Edit ToDo Item screen, which displays all the task's current information in editable fields, including the title, description, priority level, and due date.
The editing interface mirrors the task creation screen, allowing users to modify any aspect of the task. Once changes are made, users can save their updates by tapping the green "Save Changes" button at the bottom of the screen, or discard modifications by tapping the red "Cancel" button. After saving, the task list automatically updates to reflect the new information, ensuring the changes are immediately visible.
Deleting a Task
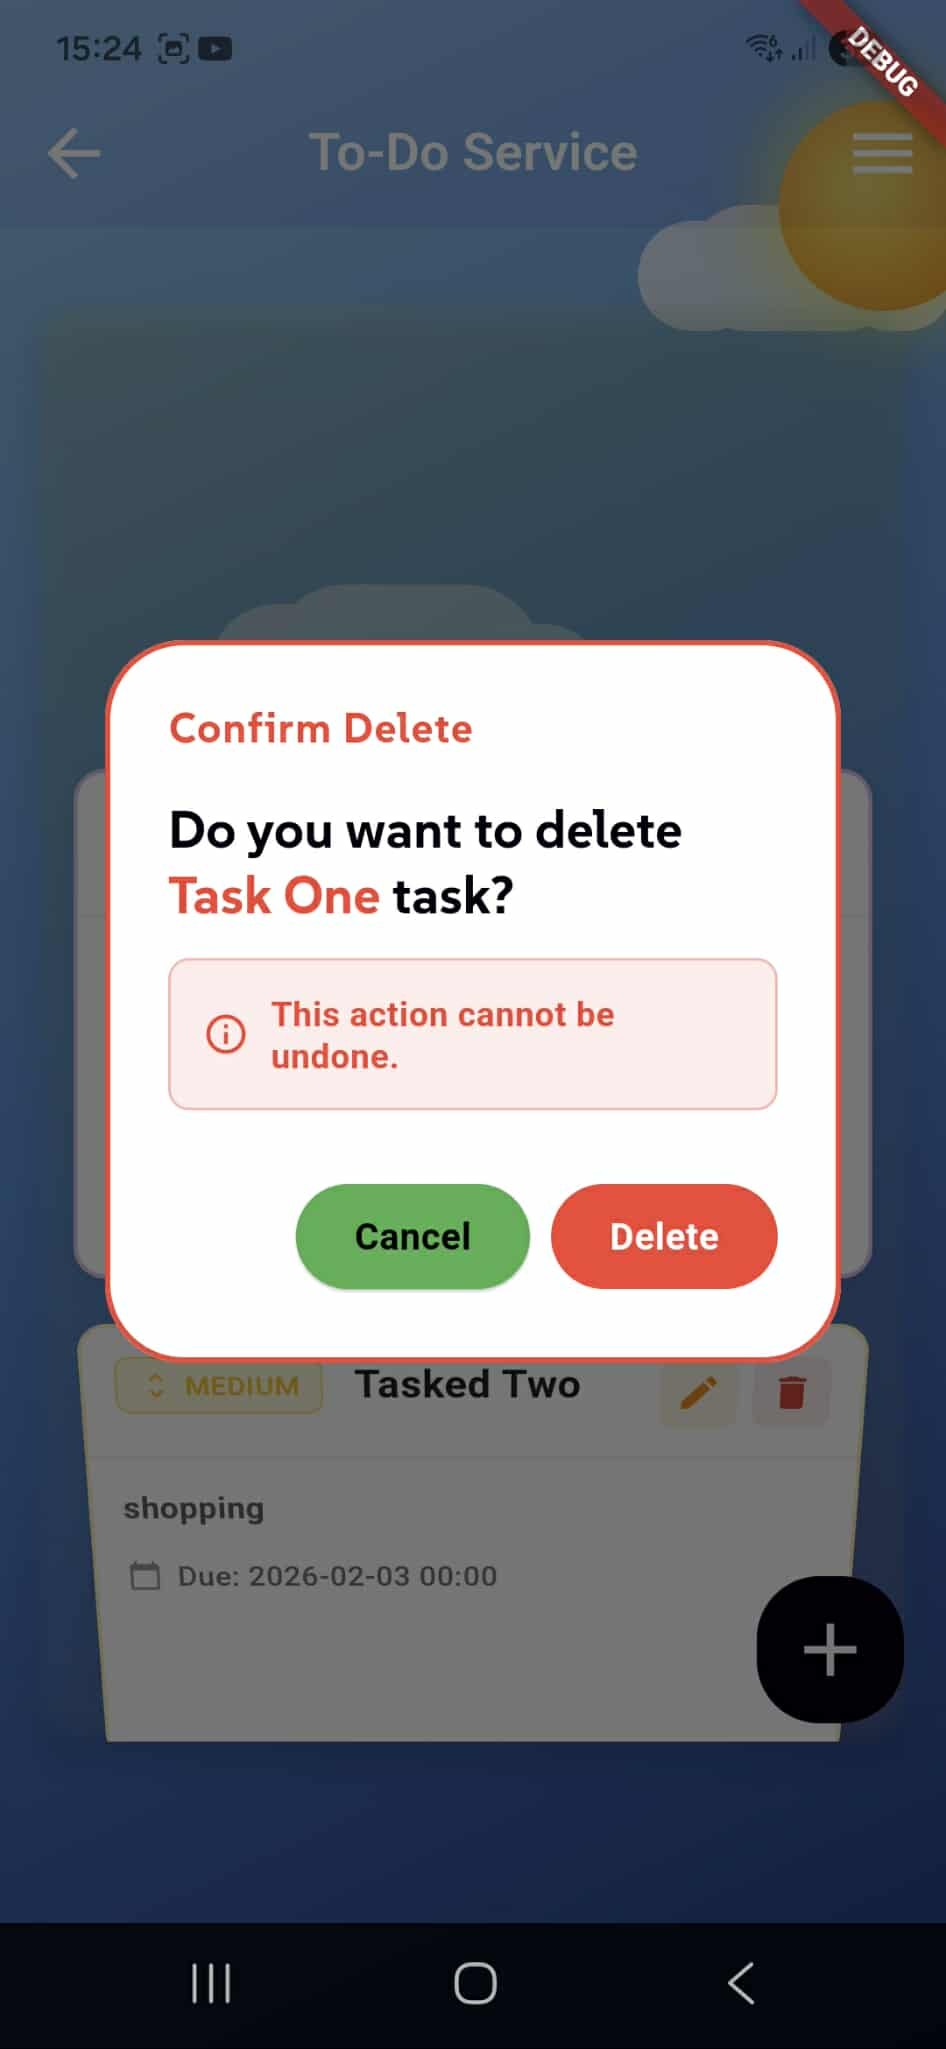
Users can delete any task by tapping the delete icon (trash bin) on the task card in the main list. This action triggers a confirmation modal that appears as an overlay, ensuring users don't accidentally remove important tasks.
The confirmation dialog displays the message "Do you want to delete [Task Name] task?" and includes a warning that states "This action cannot be undone." Users can proceed by tapping the red "Delete" button to permanently remove the task, or tap the green "Cancel" button to dismiss the modal and keep the task. Once deleted, the task is immediately removed from both the Hive local storage and the application interface, with no option for recovery. This permanent deletion ensures data integrity while requiring deliberate user confirmation.