Invoice service
The Invoice Service allows users to quickly create professional PDF invoices directly from their mobile device. Invoices can be saved, printed, or shared via email and social media, making billing fast and accessible anywhere.
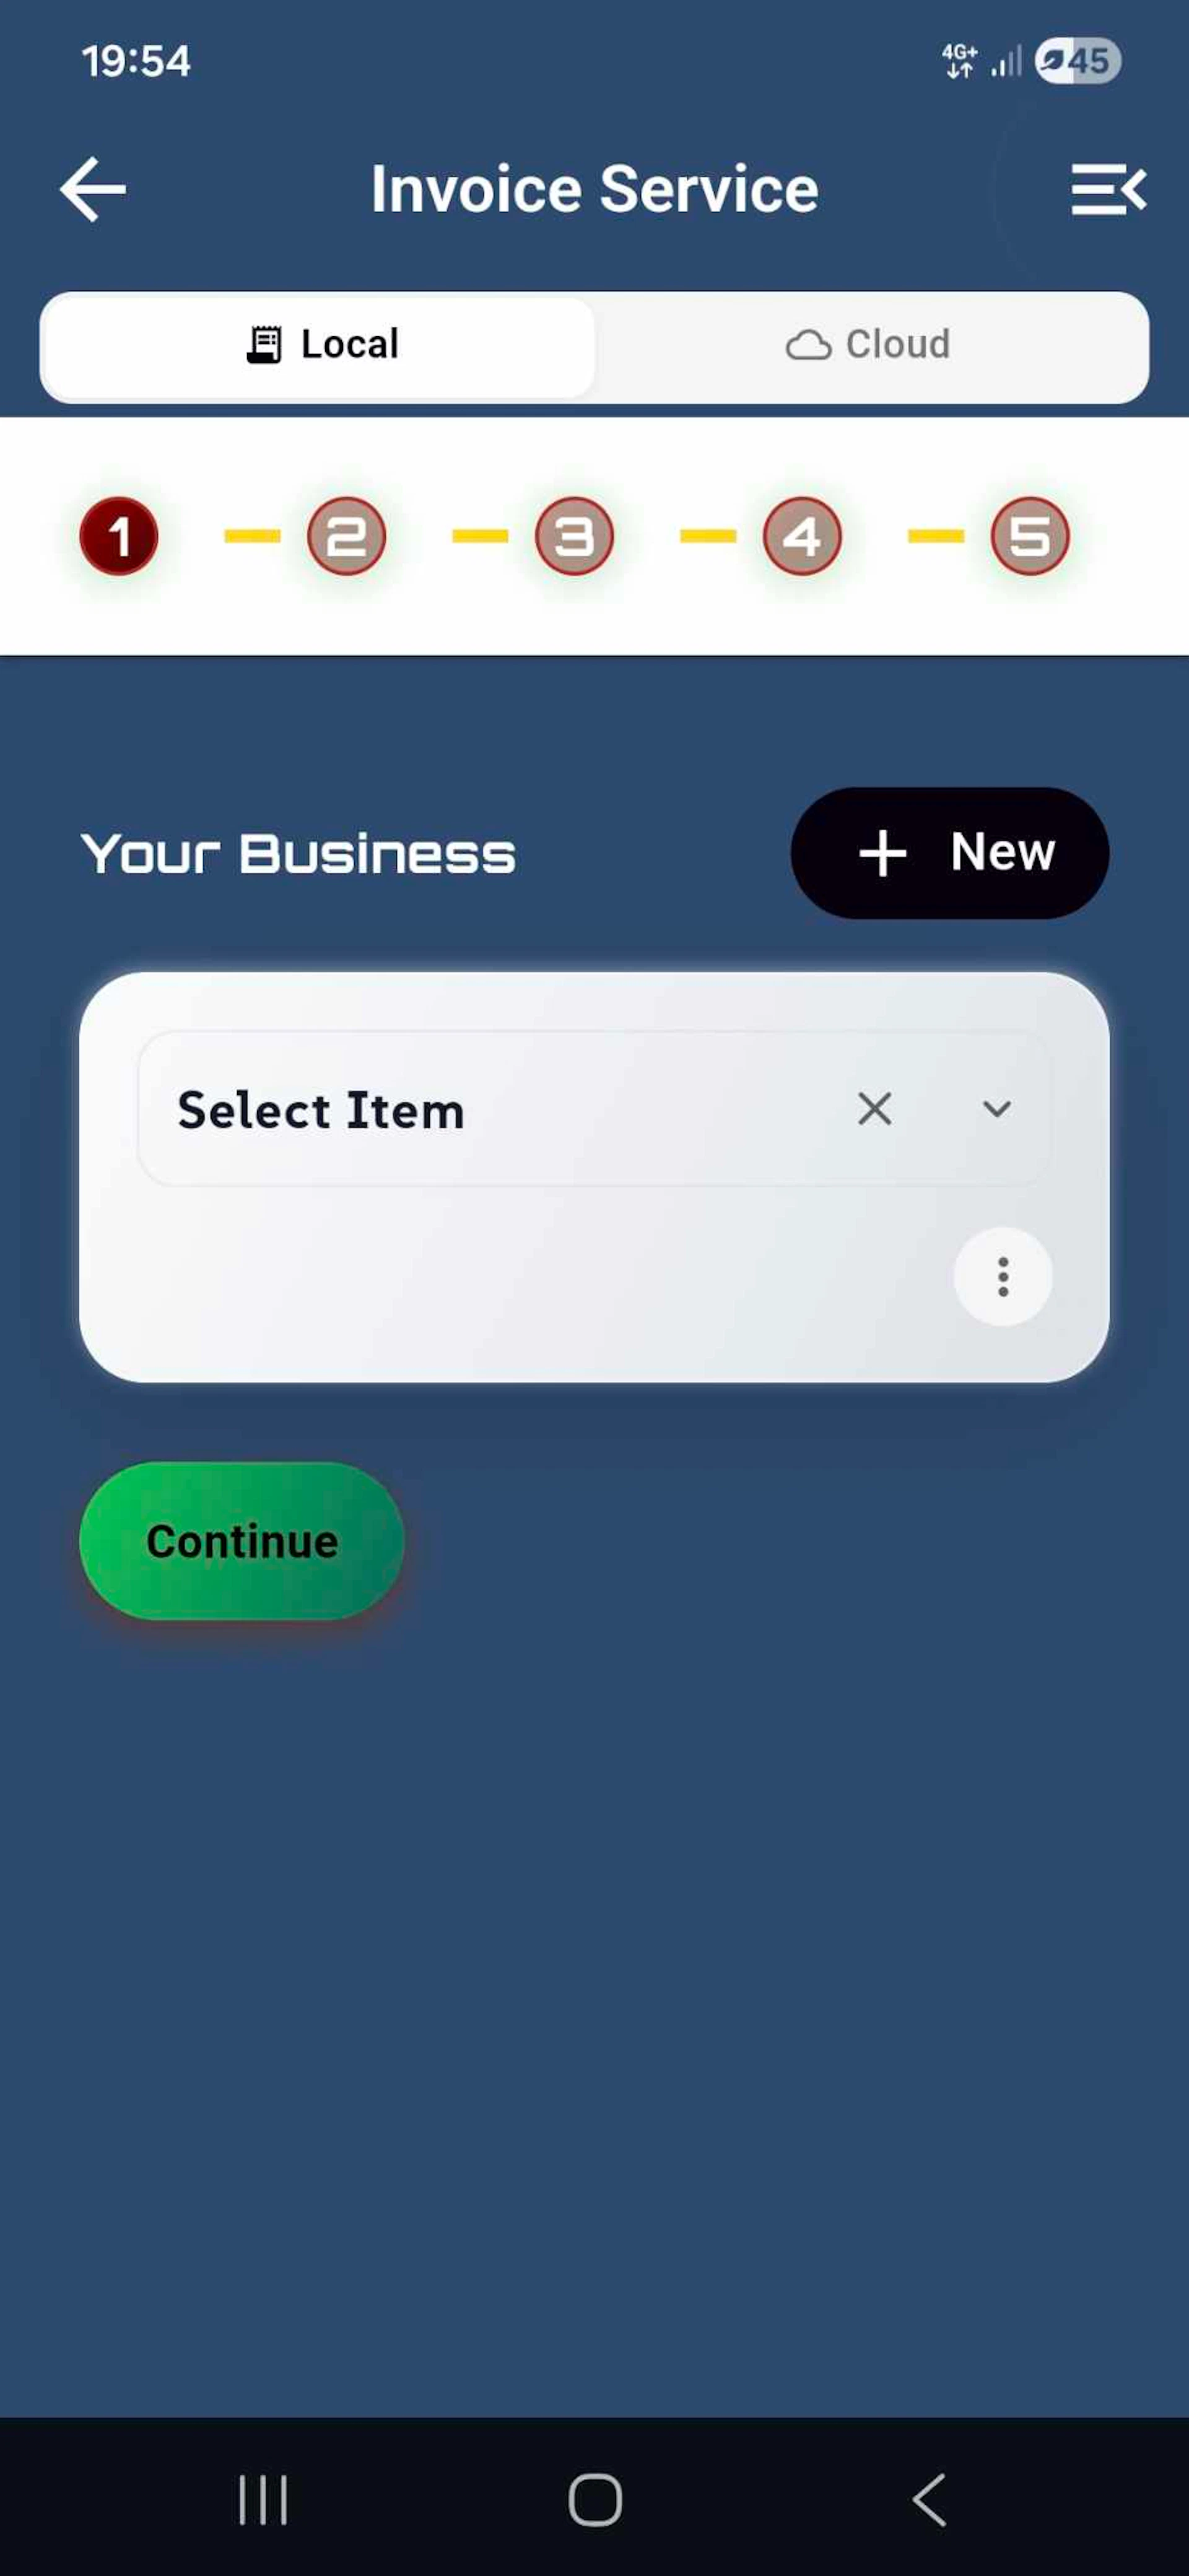
This is the first step in a streamlined 5-step invoice creation process. Users begin by selecting which business the invoice is for from their saved business profiles. The "Your Business" card displays the selected business, with options to edit or delete it using the action buttons.
A floating "New" button allows users to create a new business profile directly from this screen. The "Continue" button becomes active once a business is selected, enabling users to proceed to the next step.
The screen features an animated background gradient that creates an engaging and modern user experience while maintaining focus on the essential selection interface.
Select Your Client
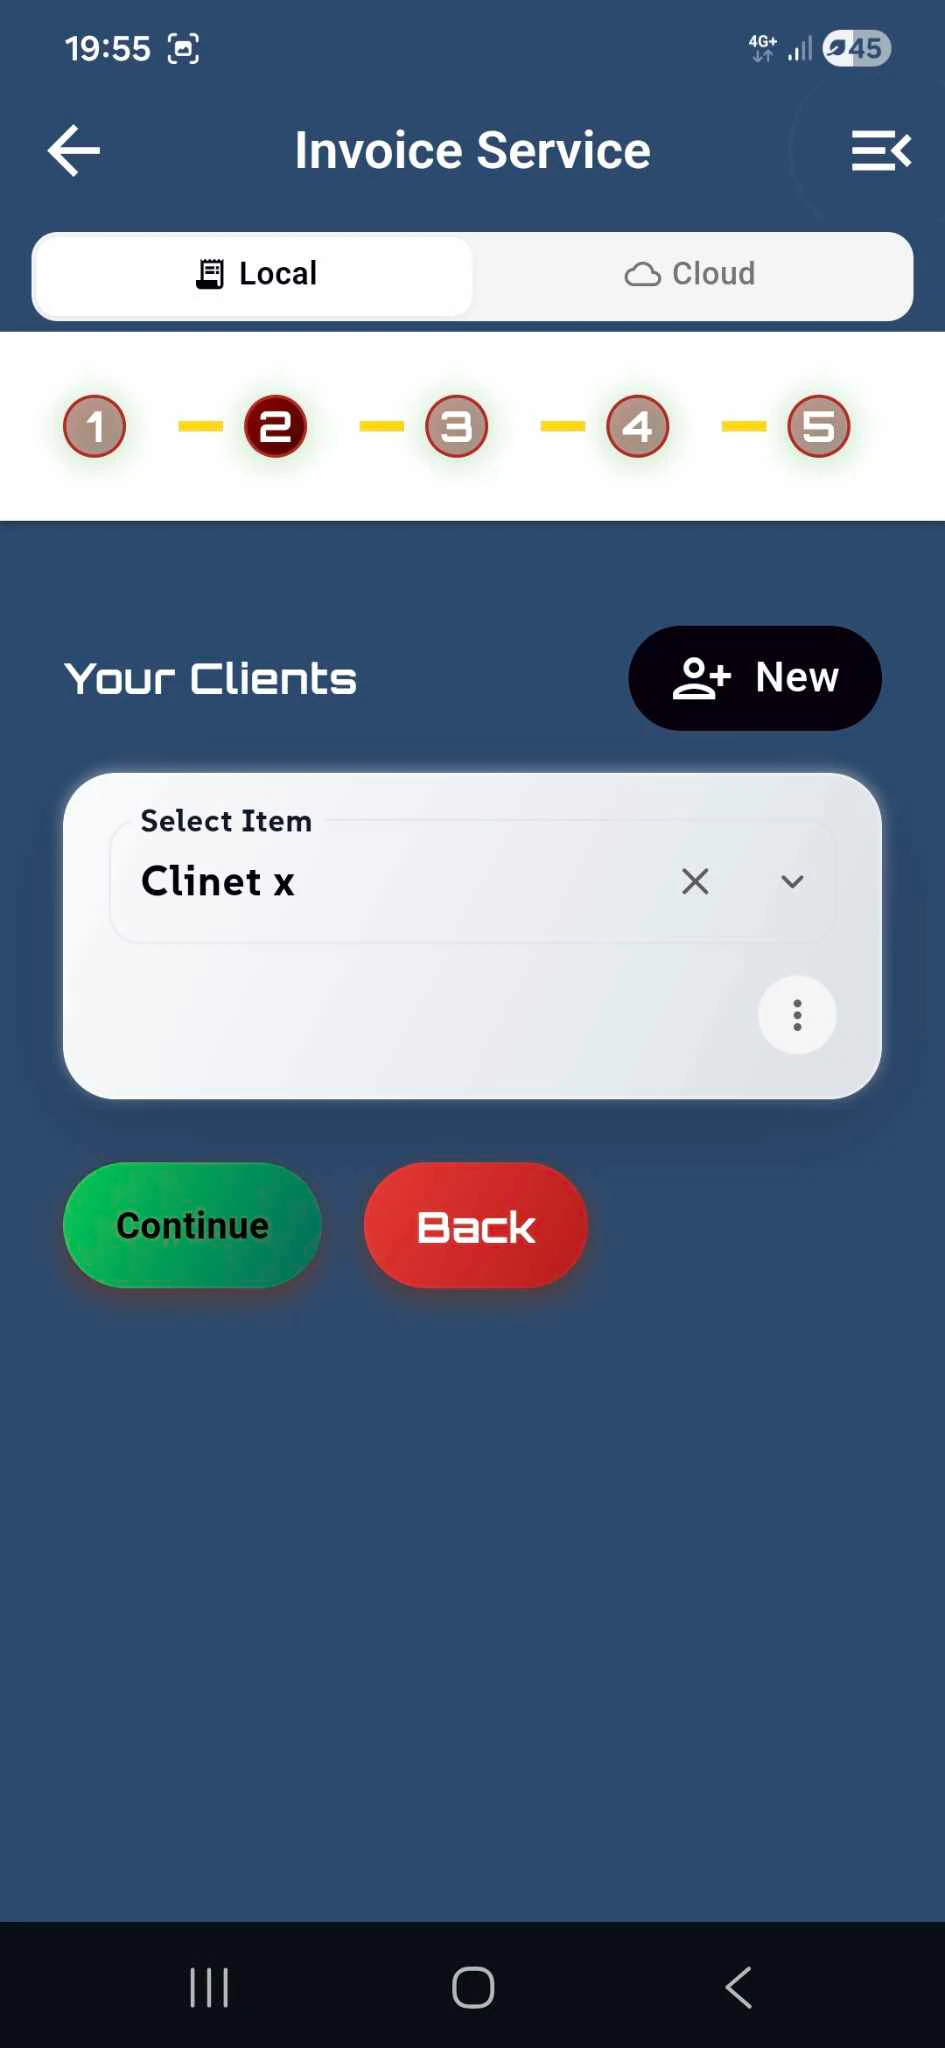
In the second step of the invoice creation process, users select the client they're invoicing. The screen displays a "Your Clients" section where users can choose from their saved client profiles stored either locally on their device or synced to the cloud via the storage toggle at the top.
The "Select Item" dropdown shows the currently selected client (e.g., "Client 1 name") with quick access to edit or delete actions via the blue pencil and red trash icons. This allows users to manage client information on the fly without leaving the invoice workflow.
A floating "New" button enables users to create a new client profile directly from this screen, streamlining the process when billing a first-time customer. The "Continue" button becomes active once a client is selected, while the "Back" button allows users to return to the previous step.
The animated background gradient continues to provide visual engagement while maintaining a clean, focused interface for client selection.
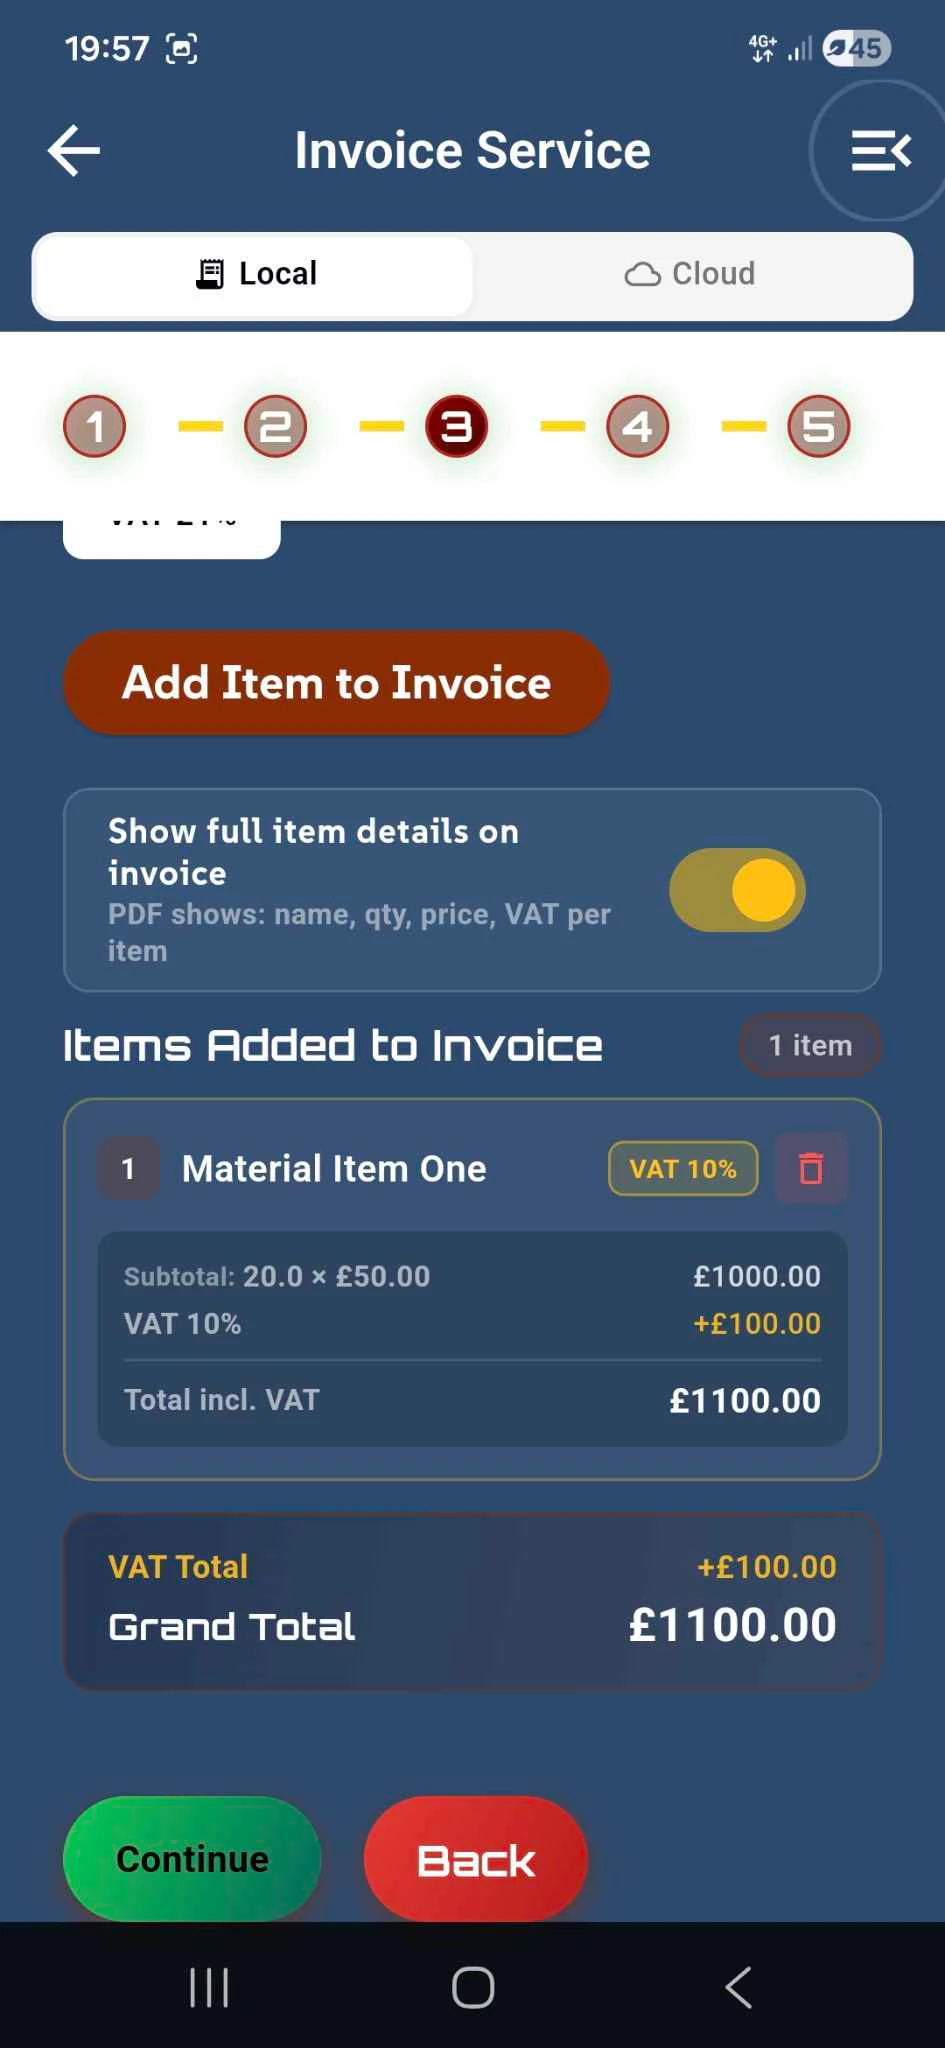
Add Items to Invoice
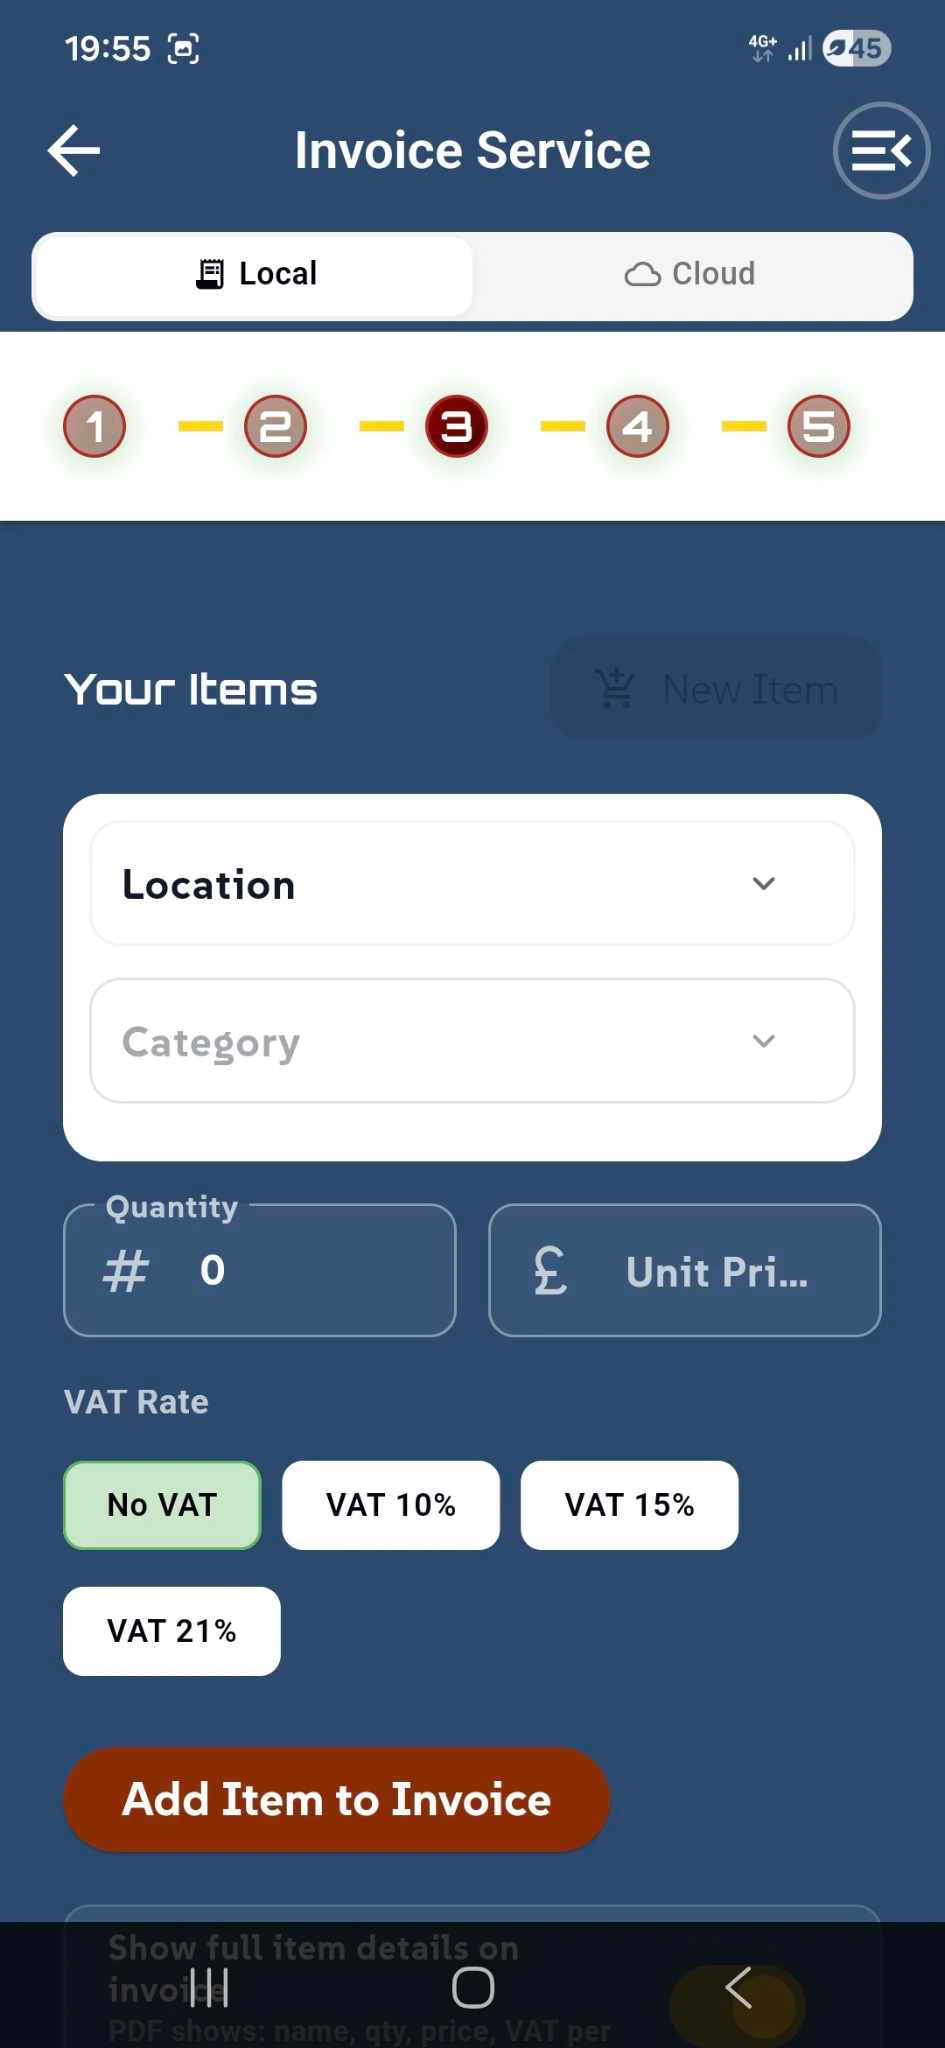
In the third step, users add products or services to their invoice by selecting items from their Storage Service inventory. This integration allows seamless access to all stored items across locations and categories.
Users begin by selecting a Location (e.g., "London") and then choosing a Category (e.g., "Bikes") to filter their inventory. From the filtered results, they can select specific items using the "Select Item" dropdown (e.g., "Road Bike"). Each selected item displays edit and delete options via the action icons.
The Quantity counter allows users to specify how many units to add, with intuitive plus and minus buttons for adjustment. Once configured, the "Add Item to Invoice" button adds the item to the invoice list below.
The "Items Added to Invoice" section displays all added items as cards, showing the item name, total quantity, and price. Each card includes a delete icon for quick removal if needed. Users can add multiple items before proceeding, with "Continue" and "Back" buttons available for navigation.
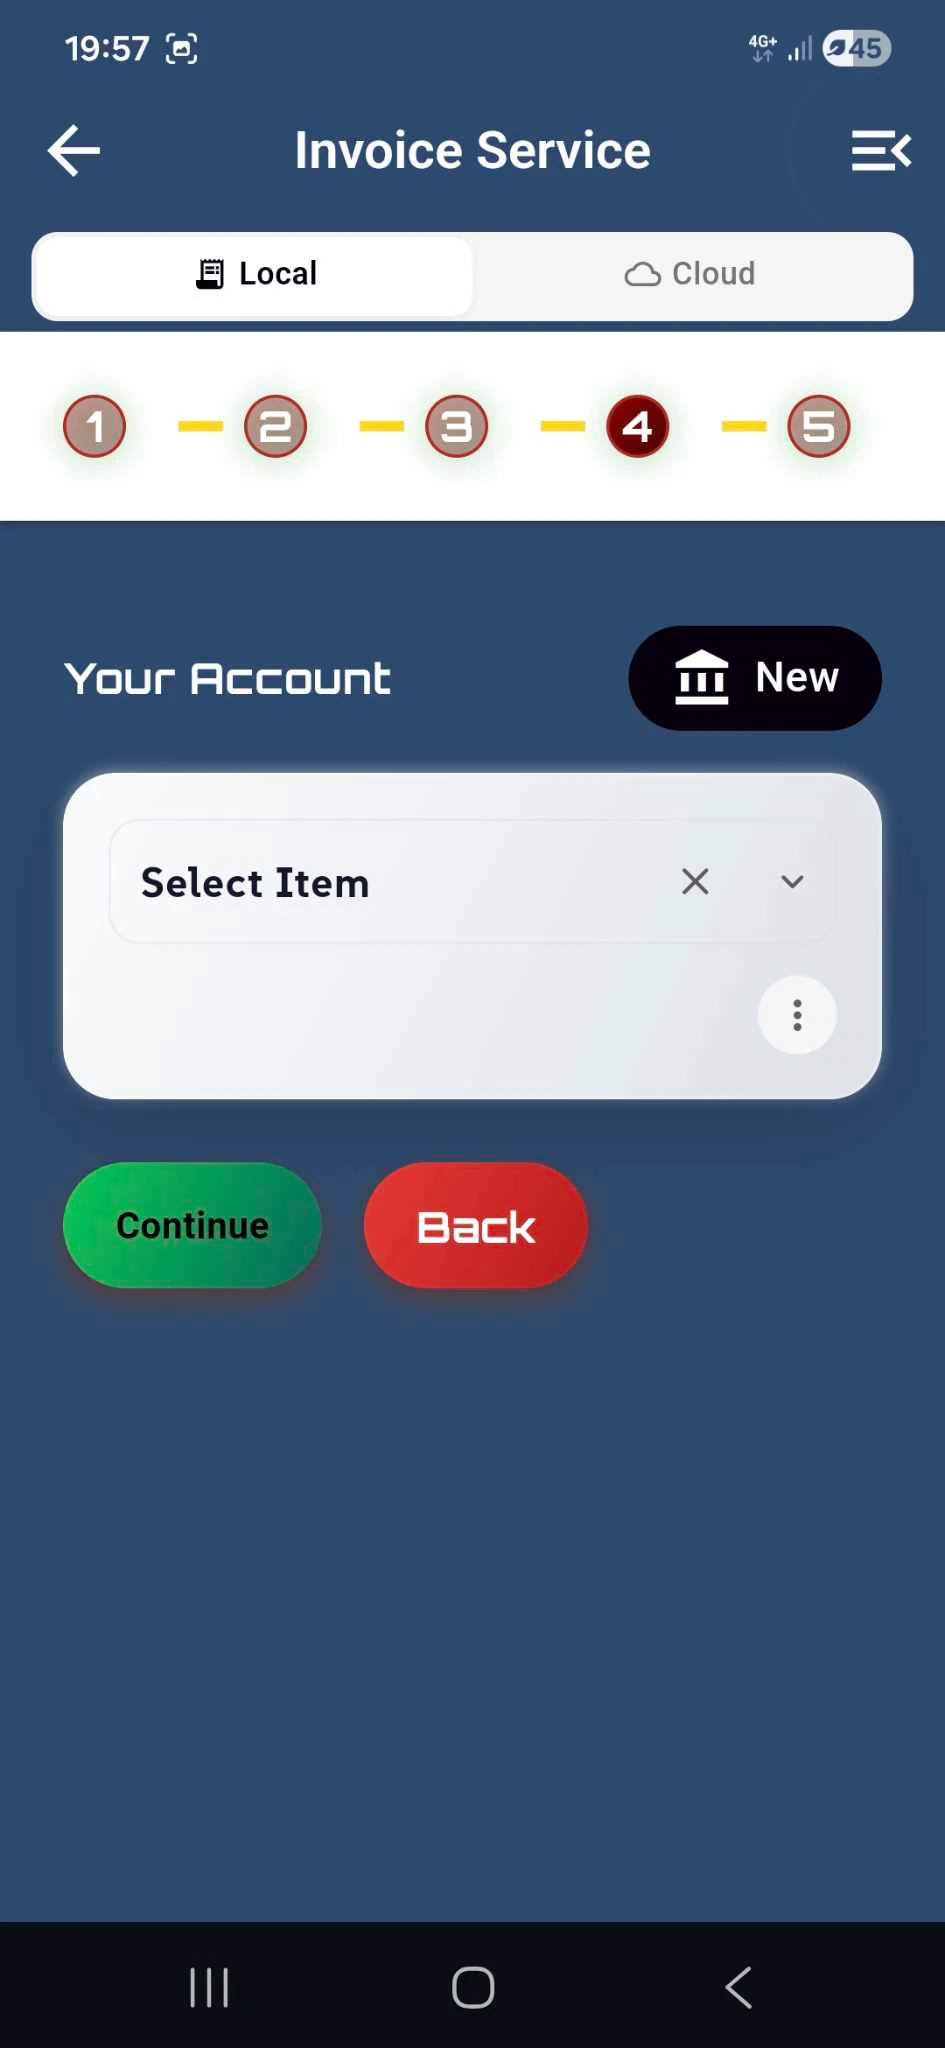
Select Bank Account
In the fourth step, users select which bank account should appear on the invoice for payment purposes. The "Your Account" section displays all saved bank account profiles stored either locally on the device or synced to the cloud.
The "Select Item" dropdown shows the currently selected bank account (e.g., "Bank UK") with quick access to edit or delete actions via the blue pencil and red trash icons. This allows users to manage their banking information without leaving the invoice workflow.
A floating "New" button enables users to add a new bank account profile directly from this screen, making it easy to include different payment accounts for various business needs.
Important: Bank details are exclusive to the Invoice Service and are not shared across other services within the BusiTools application, ensuring privacy and security of sensitive financial information. Once a bank account is selected, users can proceed with the "Continue" button or return to the previous step using the "Back" button.
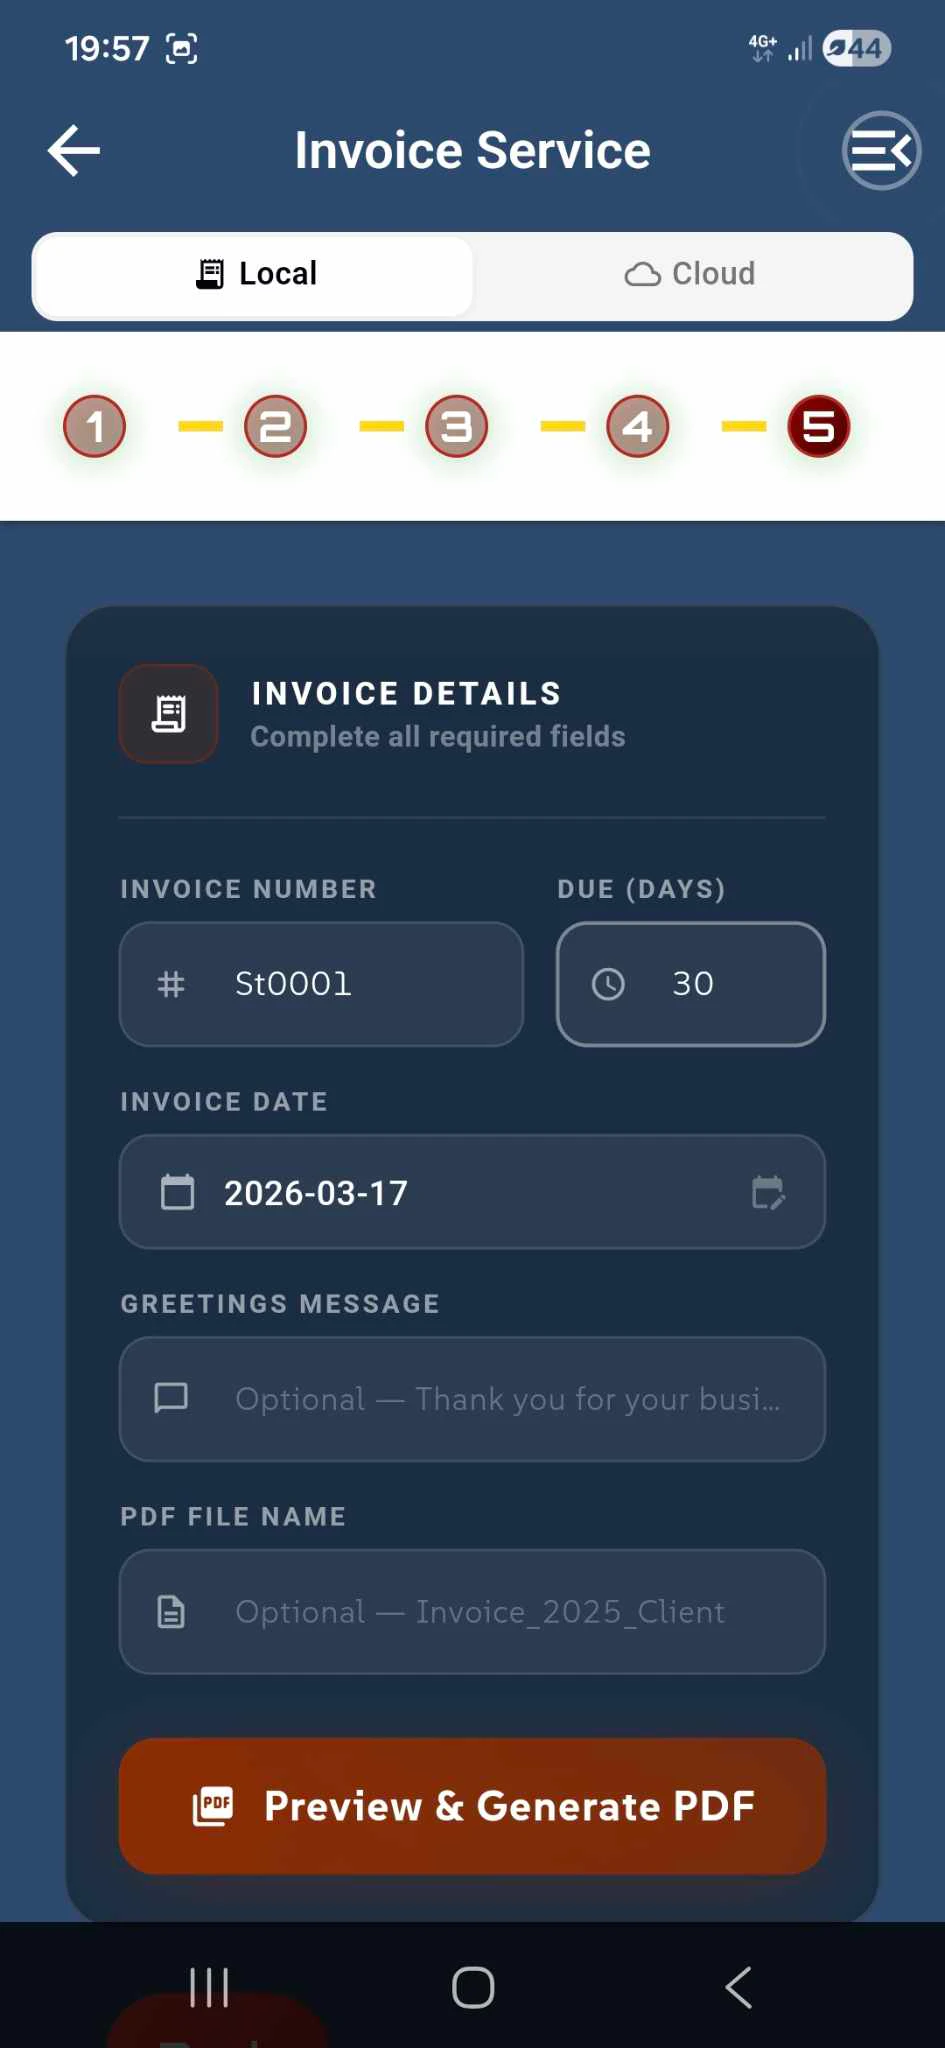
Finalize Invoice Details
In the fifth and final step, users complete their invoice by configuring the remaining details before generating the PDF document.
The Invoice Number field displays an automatically generated invoice number (e.g., "#INV0003") to ensure proper tracking and record-keeping. Users can add a personalized Greetings Message that will appear on the invoice - a default message is provided (e.g., "Thank you for your business..."), but it can be customized to match the business's tone.
The "Payment is due (Days)" field allows users to specify the payment terms, with a range from 1 to 360 days after the invoice date. This sets clear expectations for when payment should be received. Users can also select a specific Invoice Date using the date picker, with a calendar icon for easy access.
The PDF File Name field is optional, allowing users to customize how the invoice will be saved (e.g., "Invoice_2025_Client_Name..."). If left blank, a default filename is automatically generated.
Once all details are configured, the "Preview your PDF" button generates the invoice and displays it for final review before saving, printing, or sharing. The "Back" button allows users to return to previous steps if any changes are needed.
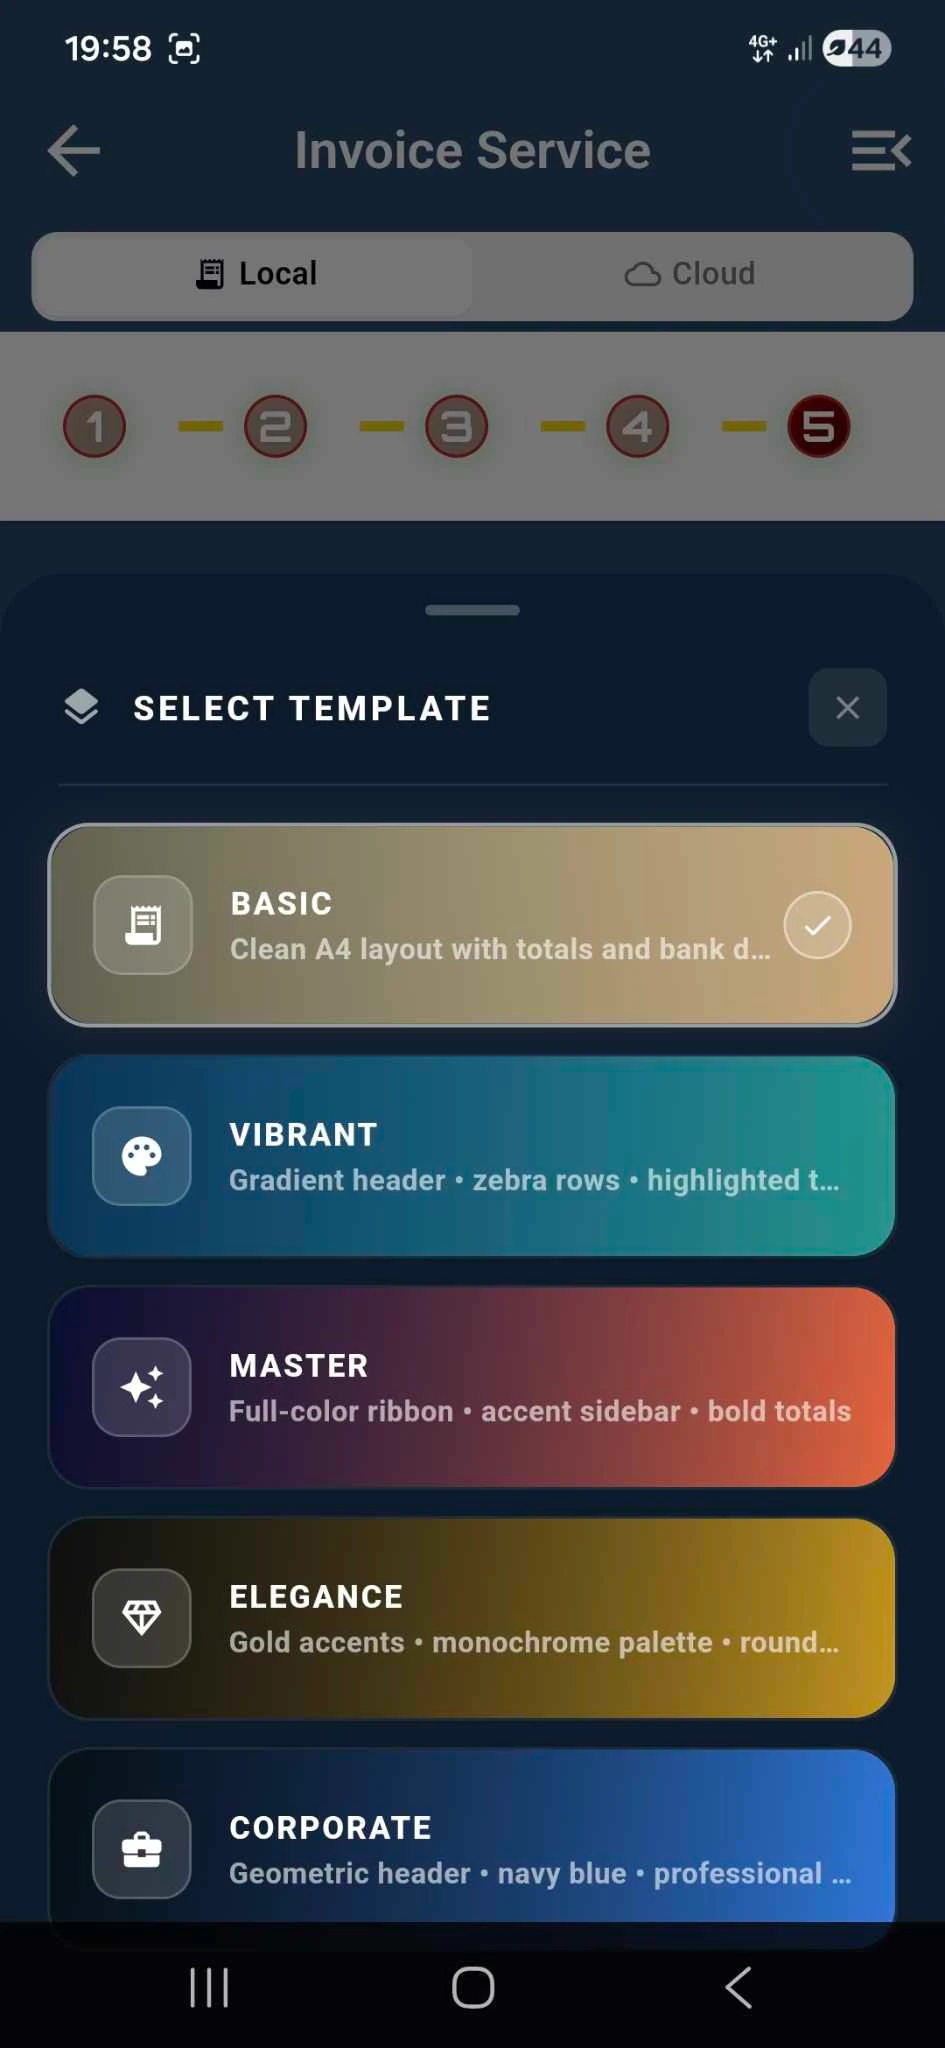
Choose Your Invoice Template
After completing all invoice details and clicking the "Preview your PDF" button, users are presented with a template selection modal offering different design options for their invoice.
The "Choose Invoice Template" dialog displays available templates with visual previews. The "Vibrant" template is the basic free option included with the application, featuring a clean and professional design suitable for all business needs.
The "Master" template offers a more colorful and sophisticated design with enhanced visual appeal. This premium template is available exclusively to users with full paid access to the BusiTools application, providing added value for subscribers who want their invoices to stand out.
Users can select their preferred template by tapping on it, or dismiss the modal using the "Cancel" button to return to the previous screen. Once a template is selected, the invoice PDF is generated and ready to be saved, printed, or shared via email and social media.
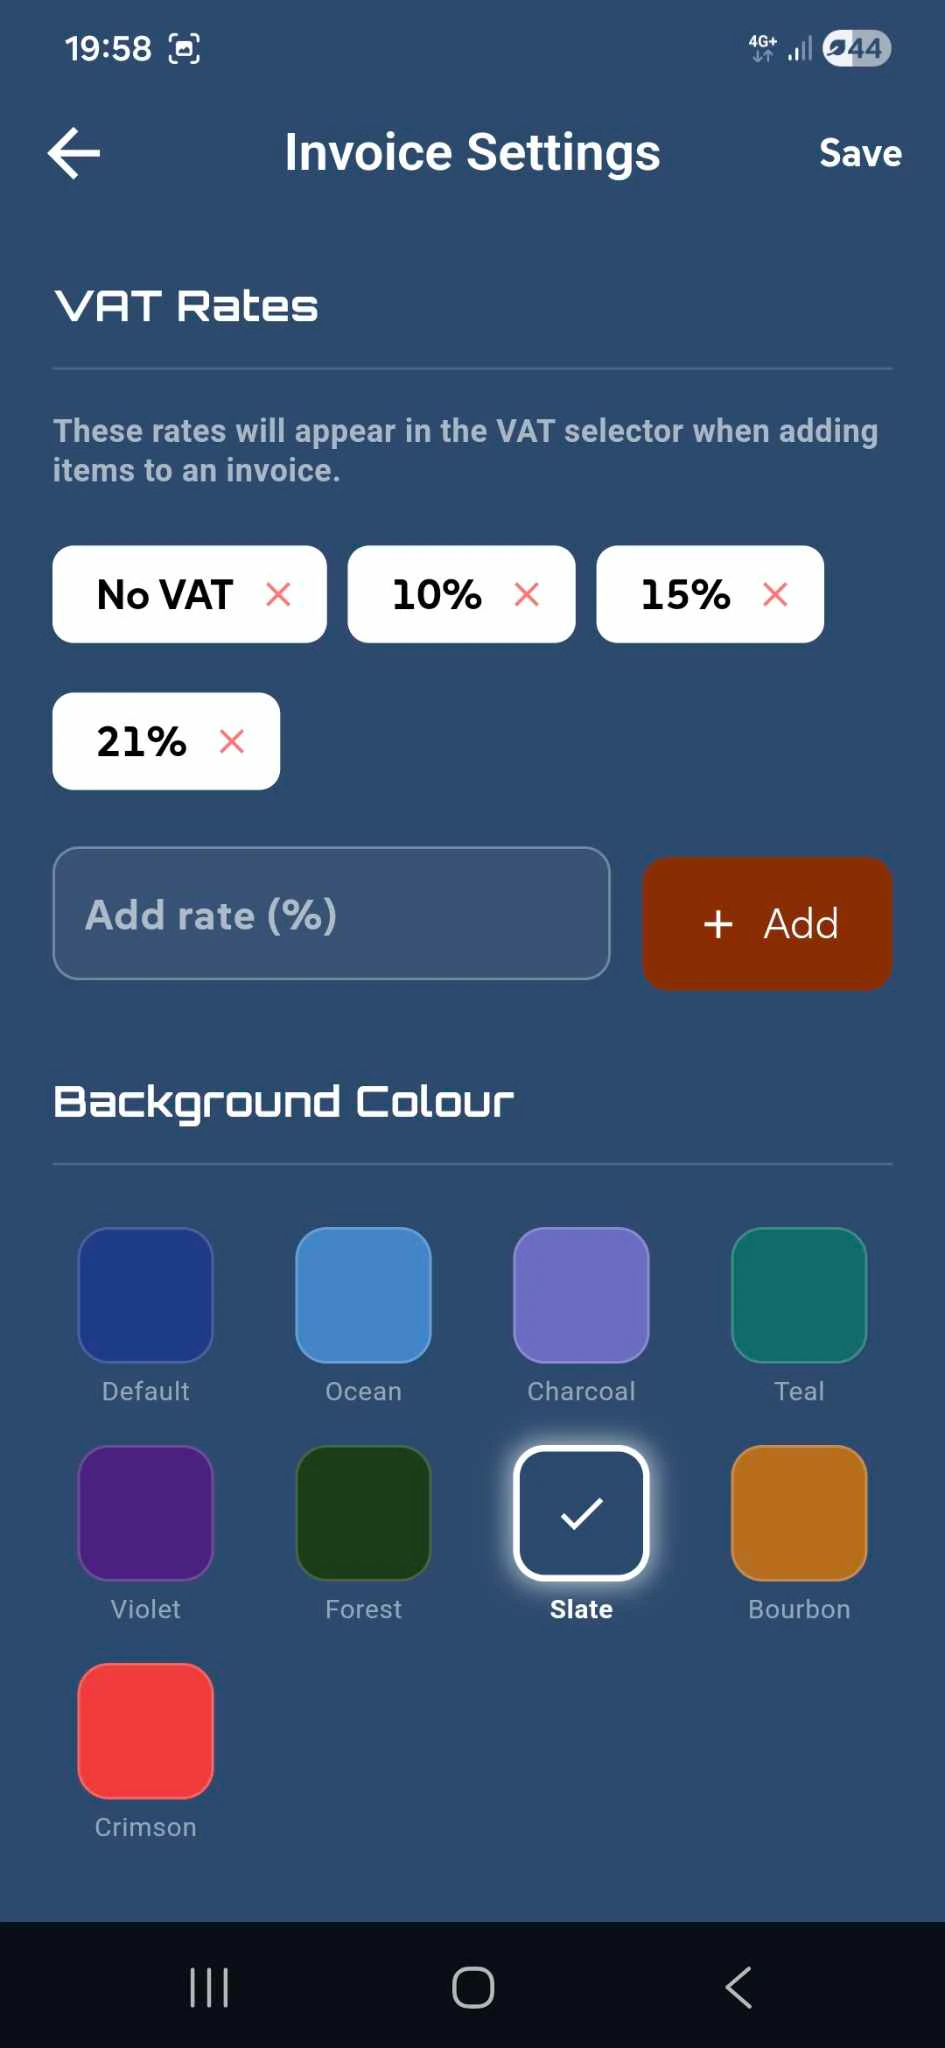
Invoice Settings Screen